建立一个基本场景
在这个教程中,我们将使用Babylon.js建立一个基本3D场景
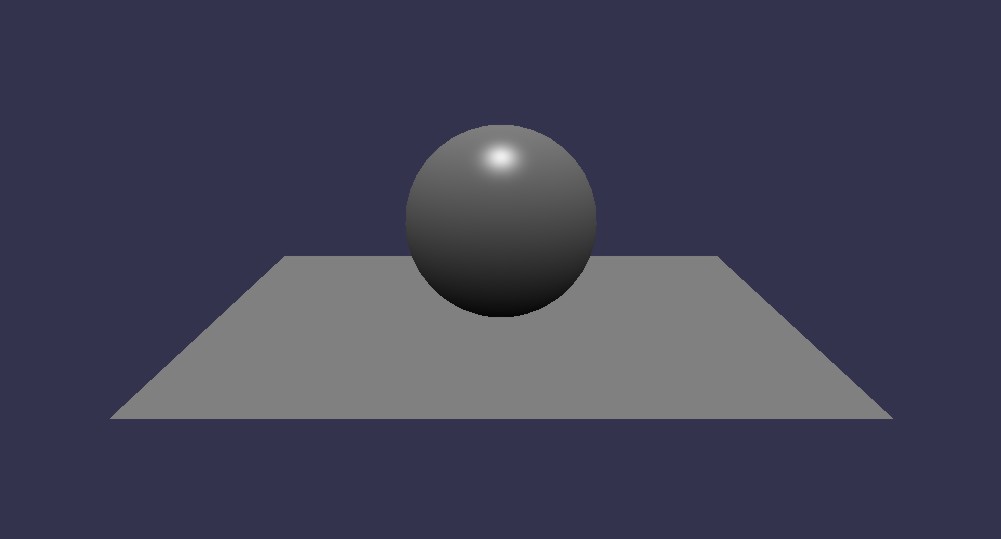
在这个基本场景中有两个基本形状
在你开始之前,请确定你有一个支持WebGL的浏览器(比如Internet Explorer 11+, Firefox 4+, Google Chrome 9+, Opera 15+, 等等.).
HTML文档部分
第一步,建立一个基本的HTML5网页
<!DOCTYPE html>
    <html xmlns="http://www.w3.org/1999/xhtml">

    <head>
    <meta http-equiv="Content-Type" content="text/html; charset=utf-8"/>
    <title>Babylon - Basic scene</title>
    </head>

    <body>
    </body>

    </html>
CSS样式表部分
在<head>标签中, 请加入这一段CSS以保证canvas标签保持最大化
<style>
    html, body {
    overflow: hidden;
    width: 100%;
    height: 100%;
    margin: 0;
    padding: 0;
  }

    #renderCanvas {
    width: 100%;
    height: 100%;
    touch-action: none;
  }
    </style>
JavaScript外部引用部分(框架)
现在我们加载框架文件。在CSS的后面,(但是仍然在<head>标签里),请加入以下内容:
<script src="babylon.js"></script>
    <script src="hand.js"></script>
    <script src="cannon.js"></script>  <!-- optional physics engine -->
    <!-- <script src="Oimo.js"></script>  New physics engine -->
(如果你现在没有这些文件,你可以在这里找到它们:https://github.com/BabylonJS/Babylon.js,还有这里:http://handjs.codeplex.com/)
接下来,我们进入网页的<body>部分。我们加入了一个HTML5 canvas标签,后面我们将在这个标签内绘制3D场景。
<canvas id="renderCanvas"></canvas>
现在,我们从HTML5标签的书写跳转到JavaScript脚本书写。请在<body> 部分中加入:
<script>

    // 从上面的HTML中取得canvas元素
    var canvas = document.getElementById("renderCanvas");

    //加载BABYLON 3D 引擎
    var engine = new BABYLON.Engine(canvas, true);
现在,你将开始添加场景创建代码。为了保证你的代码可以适应Babylon.js Playground,我们建议你在这里插入一个‘createScene’方法,除了生成一个Babylon场景对象之外,createScene()也是你添加你的基本场景设定的地方,包括:一个相机,一个光源,还有一个或多个形状/网格。
所以现在请将整个 createScene 方法加入到你的网页中:
  // 这相当于一个构造函数,在场景对象建立时将会执行。
    var createScene = function () {

    // 建立基本场景
    var scene = new BABYLON.Scene(engine);

    // 将场景的背景色改为绿色
    scene.clearColor = new BABYLON.Color3(0, 1, 0);

    // 创建并放置一个自由相机
    var camera = new BABYLON.FreeCamera("camera1", new BABYLON.Vector3(0, 5, -10), scene);

    // 将相机的目标指向场景的原点
    camera.setTarget(BABYLON.Vector3.Zero());

    // 为相机添加一个基于canvas的控制器
    camera.attachControl(canvas, false);

    // 建立一个光源,指向0,1,0方向——竖直朝上。
    var light = new BABYLON.HemisphericLight("light1", new BABYLON.Vector3(0, 1, 0), scene);

    // 令光源变得稍微昏暗
    light.intensity = .5;

    // 让我们尝试Babylon.js内建的‘球’形状。参数:名字,弧面细分度,直径,所属场景
    var sphere = BABYLON.Mesh.CreateSphere("sphere1", 16, 2, scene);

    //将球体上移它直径的一半(球体默认绘制在原点,上移后原点在球体的正下表面处)
    sphere.position.y = 1;

    // 尝试Babylon.js内建的‘地面’形状。参数:名字,宽度,深度,细分度,所属场景。
    var ground = BABYLON.Mesh.CreateGround("ground1", 6, 6, 2, scene);

    // 将生成的场景对象返回
    return scene;

    };  // 结束createScene方法
好的,这将是一个很复杂的函数,但是不要让它吓退你。你将在未来的教程中学到更多关于光照、相机、内建图形等对象的参数和属性的知识。你要记住的重点是这个createScene方法包含了所有的全局设定。它包括:
- 一个Babylon场景对象
- 一个被赋予了控制器的相机
- 一个具有指向性的光源
- 一个被放在0,1,0的球体
- 一个被放在0,0,0的平面(默认位置)
还有三块额外的代码要加入到你的网页中。首先是对我们刚刚完成的createScene方法的调用。添加如下内容:
  // 现在,调用你刚刚编写完成的createScene函数
    var scene = createScene();
第二步,建立核心渲染循环,来重复的刷新场景(在C++时代这里是自己写的for语句,在原生WebGl中是requestAnimFrame,在Babylon中作者进行了进一步封装)
  // 注册一个渲染循环来重复渲染场景
    engine.runRenderLoop(function () {
    scene.render();
    });
最后,一个可选但好用的窗口大小变化处理方法。
  // 监听浏览器或canvas标签的尺寸改变事件
    window.addEventListener("resize", function () {
    engine.resize();
    });
现在,所有的JavaScript脚本编写已经完成,确保你关闭了script、body、html标签。
</script>
    </body>
    </html>
你成功了!将这个html文件和babylon.js、hand.js、cannon. js 保存在同一个文件夹中,然后用你支持WebGL的浏览器来访问。你将看到canvas中显示的3D场景
一个使用Babylon.js Playground展示的类似场景可以在这里看到。你将可以在线的查看整个场景,如果感兴趣的话可以使用'Get .zip' 功能来下载整个index.html文件
遇到问题了?
这里是整个网页:
<!doctype html>
    <html>
    <head>
    <meta charset="utf-8">
    <title>Babylon - Basic scene</title>
    <style>
      html, body {
         overflow: hidden;
         width: 100%;
         height: 100%;
         margin: 0;
         padding: 0;
      }
      #renderCanvas {
         width: 100%;
         height: 100%;
         touch-action: none;
      }
   </style>
    <script src="babylon.js"></script>
    <script src="hand.js"></script>
    <script src="cannon.js"></script> <!-- optional physics engine -->
    </head>
    <body>
    <canvas id="renderCanvas"></canvas>
    <script type="text/javascript">
      // Get the canvas element from our HTML below
      var canvas = document.querySelector("#renderCanvas");
      // Load the BABYLON 3D engine
      var engine = new BABYLON.Engine(canvas, true);
      // -------------------------------------------------------------
      // Here begins a function that we will 'call' just after it's built
      var createScene = function () {
         // Now create a basic Babylon Scene object
         var scene = new BABYLON.Scene(engine);
         // Change the scene background color to green.
         scene.clearColor = new BABYLON.Color3(0, 1, 0);
         // This creates and positions a free camera
         var camera = new BABYLON.FreeCamera("camera1", new BABYLON.Vector3(0, 5, -10), scene);
         // This targets the camera to scene origin
         camera.setTarget(BABYLON.Vector3.Zero());
         // This attaches the camera to the canvas
         camera.attachControl(canvas, false);
         // This creates a light, aiming 0,1,0 - to the sky.
         var light = new BABYLON.HemisphericLight("light1", new BABYLON.Vector3(0, 1, 0), scene);
         // Dim the light a small amount
         light.intensity = .5;
         // Let's try our built-in 'sphere' shape. Params: name, subdivisions, size, scene
         var sphere = BABYLON.Mesh.CreateSphere("sphere1", 16, 2, scene);
         // Move the sphere upward 1/2 its height
         sphere.position.y = 1;
         // Let's try our built-in 'ground' shape. Params: name, width, depth, subdivisions, scene
         var ground = BABYLON.Mesh.CreateGround("ground1", 6, 6, 2, scene);
         // Leave this function
         return scene;
      }; // End of createScene function
      // -------------------------------------------------------------
      // Now, call the createScene function that you just finished creating
      var scene = createScene();
      // Register a render loop to repeatedly render the scene
      engine.runRenderLoop(function () {
         scene.render();
      });
      // Watch for browser/canvas resize events
      window.addEventListener("resize", function () {
         engine.resize();
      });
   </script>
    </body>
    </html>
进一步动手来做
在前面的基础教程中,我主要在向你讲述如何将createScene方法插入一个Babylon.js项目中(虚线之间的部分)。在下面的教程中我将假定你已经掌握了这一知识。
请试着记住这个网页布局,并且理解createScene方法的重要意义。在你使用Babylon.js Playground一段时间后,你将发现createScene()是很灵活的,它可以被方便的在编辑器里复制粘贴。这将方便其他人帮助你解决问题,也将方便你帮助他人。
下一步
现在你已经准备好继续前进并学习如何建立更多的图形元素,比如球体、圆柱体、立方体等等。
下一个教程Basic elements